How to Photograph Your LEGO Set for Grading
Better photos lead to higher confidence scores and more accurate grades. Follow this guide to capture the evidence our AI needs for a thorough evaluation.
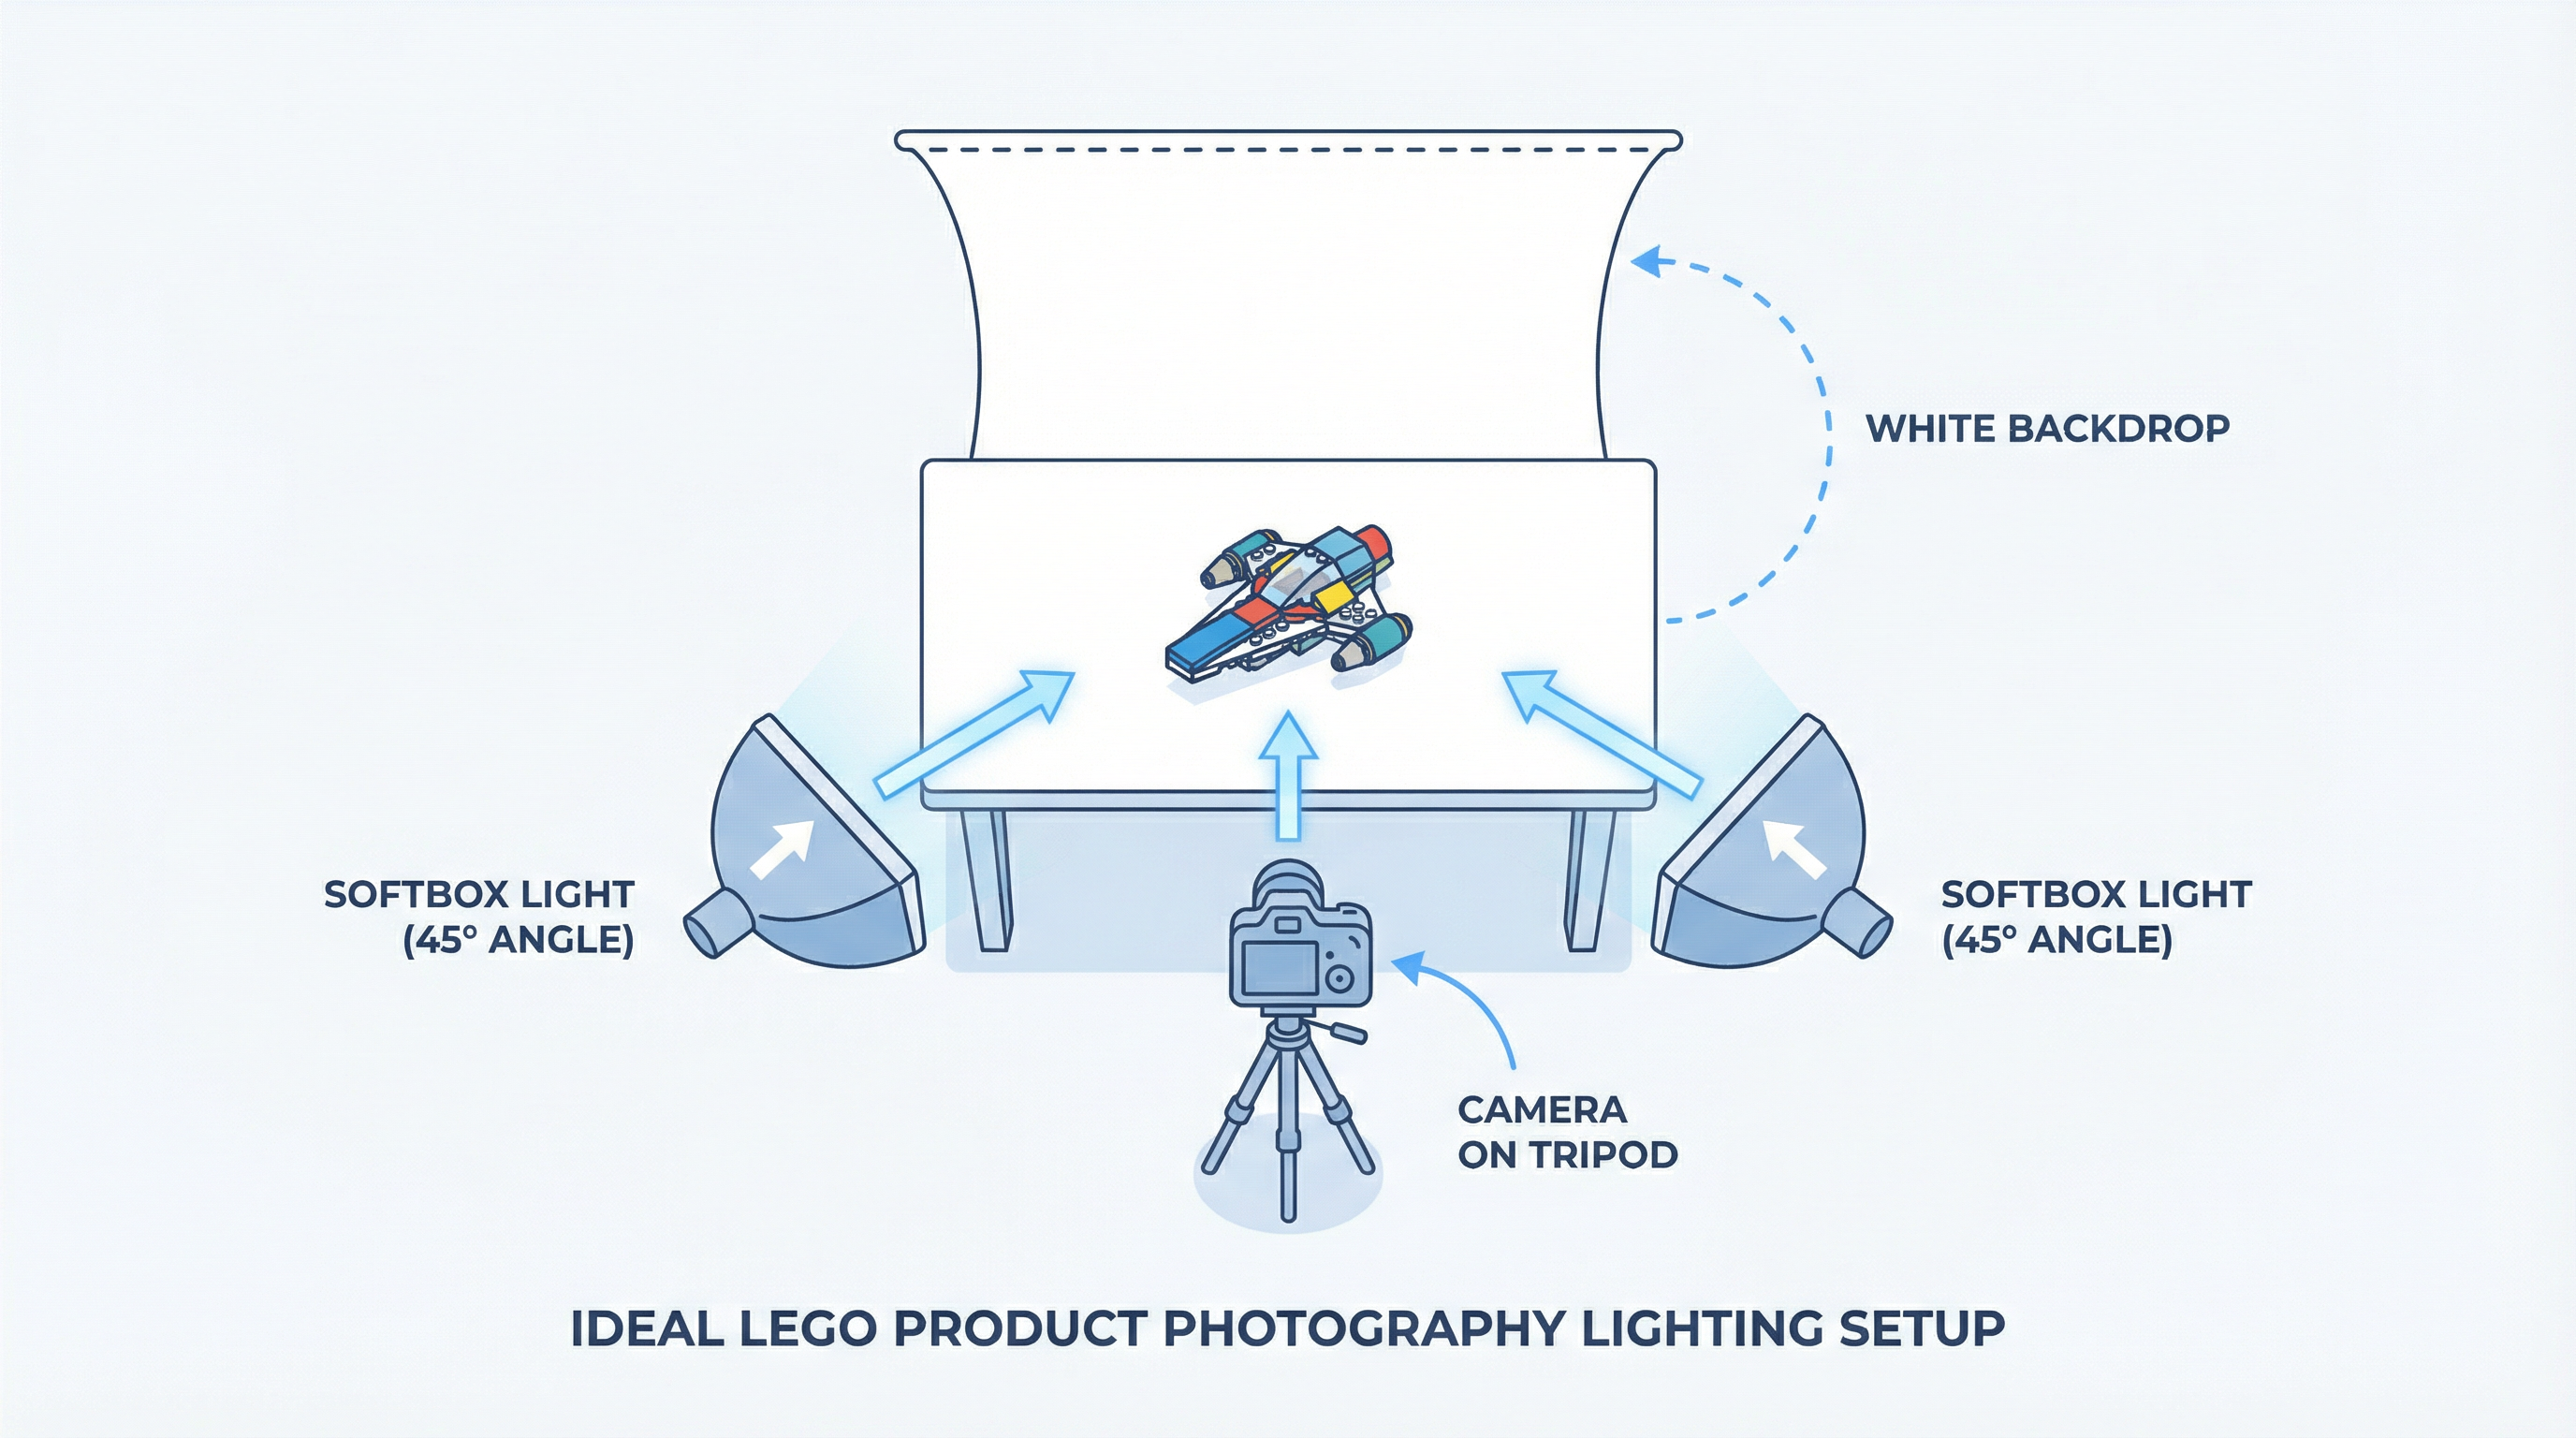
Lighting & Equipment Setup
Good lighting is the foundation of quality photos. You don't need professional equipment—a smartphone and natural light can produce excellent results.
Natural Light is Best
Position your set near a large window with indirect sunlight. Avoid direct sunlight which creates harsh shadows.
Smartphone Camera Works
Modern smartphones have excellent cameras. Use the main lens (not ultra-wide) and tap to focus on your set.
Clean White Background
Use a white poster board, sheet, or foam board. This helps the AI focus on your set without distractions.
Take Your Time
Rushing leads to blurry photos. Hold steady, let the camera focus, and review each shot before moving on.
Good vs. Bad Photography
See the difference proper technique makes. The AI can only grade what it can clearly see.
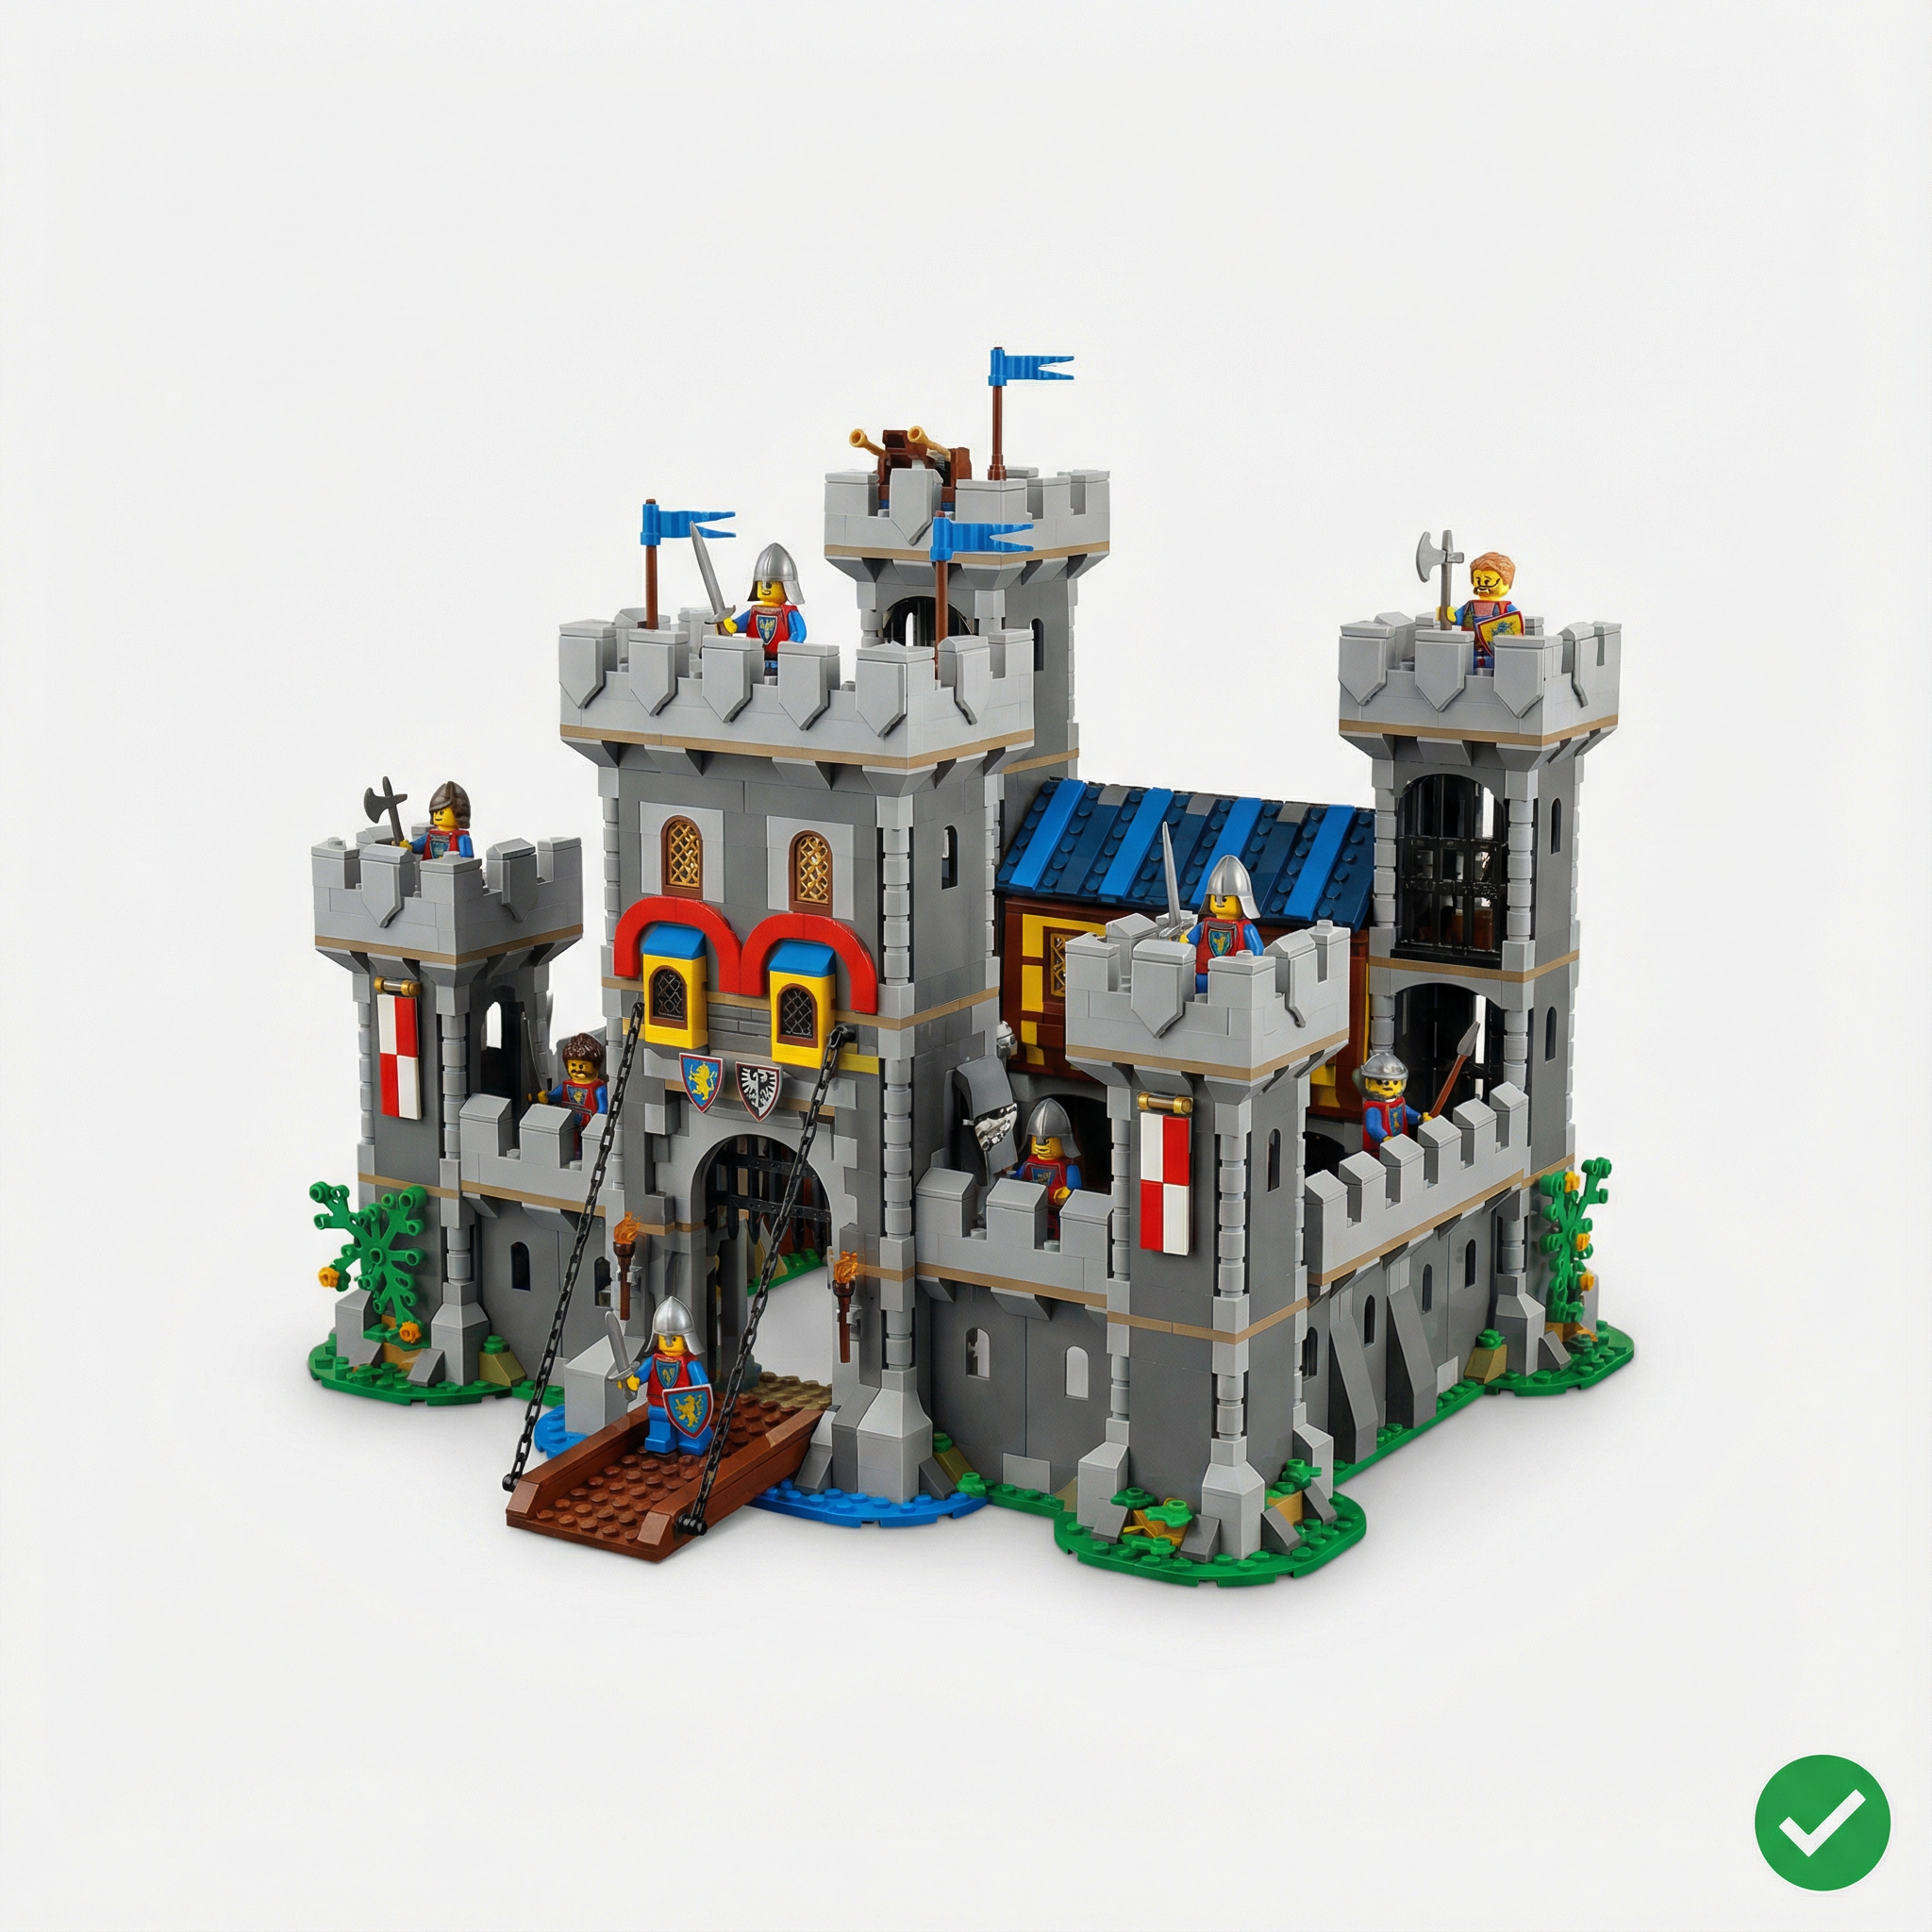
What Makes This Good
- Clean white background with no distractions
- Soft, even lighting with no harsh shadows
- Sharp focus throughout the entire set
- True colors without color cast
- Entire set visible in frame
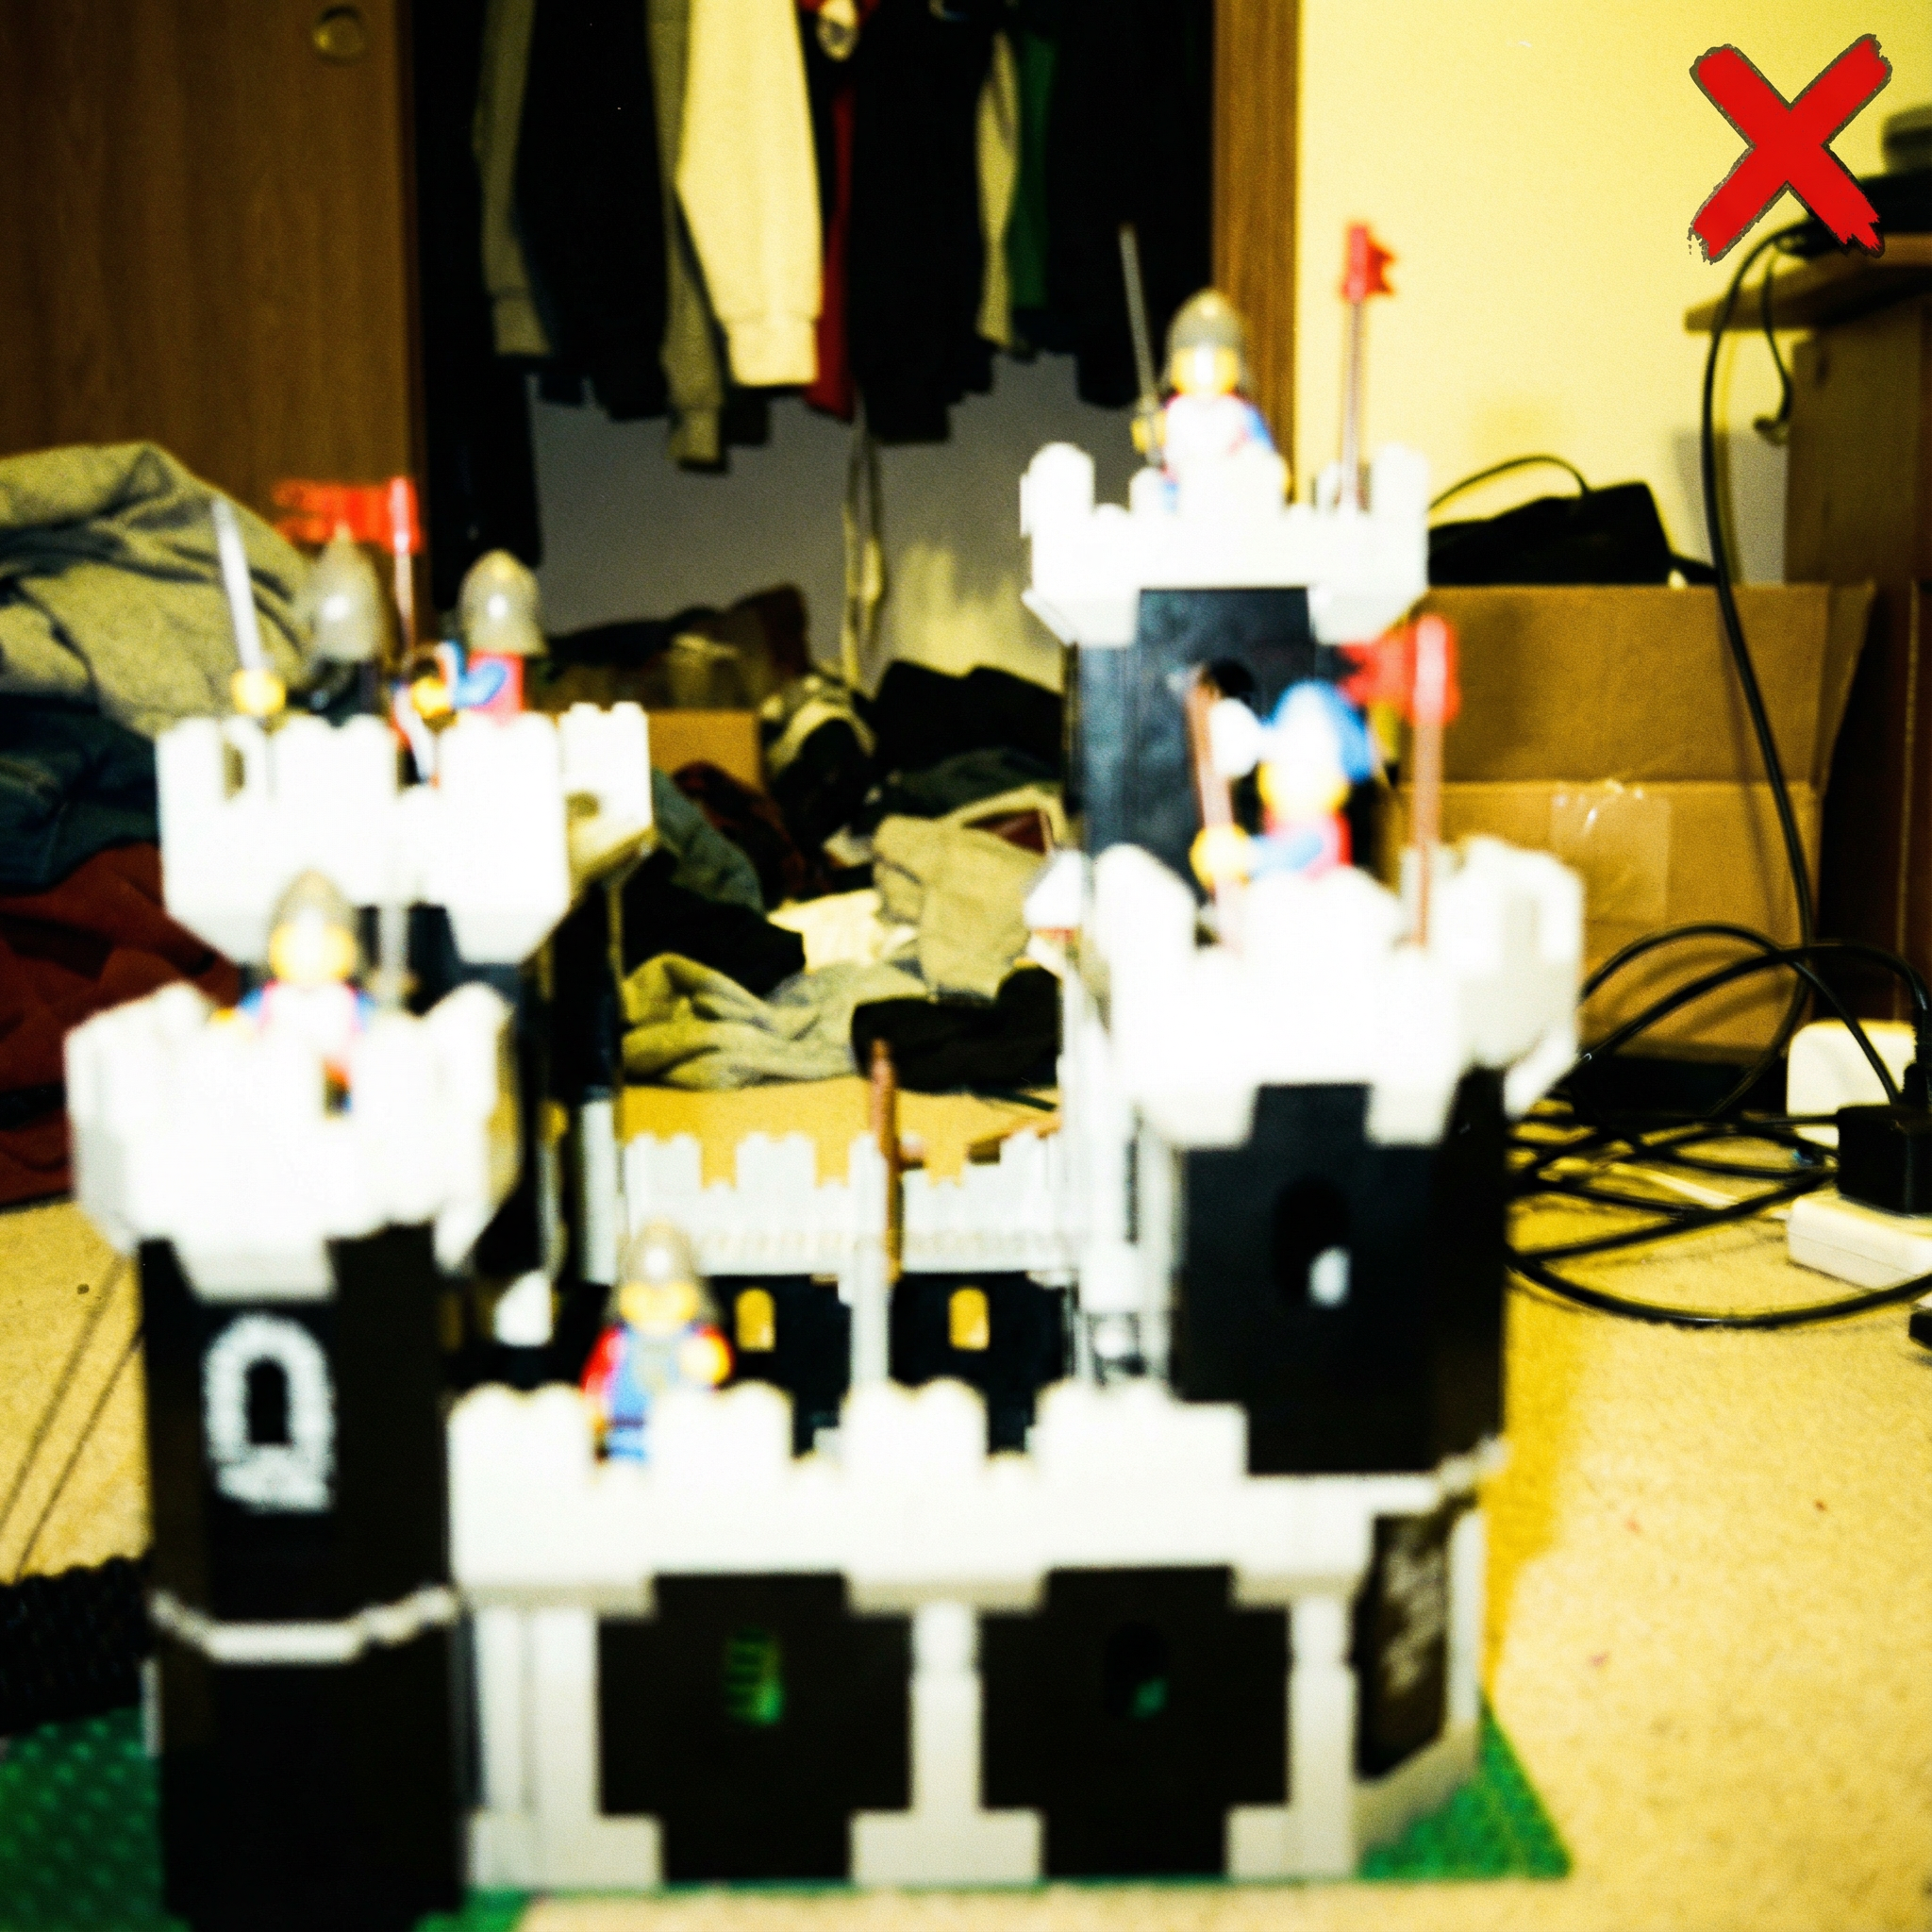
What's Wrong Here
- Cluttered background distracts from the set
- Yellow color cast from indoor lighting
- Blurry focus makes details impossible to see
- Harsh shadows hiding parts of the set
- Poor composition cuts off important areas
Required Photo Categories
Each category serves a specific purpose in the grading process. Follow these guidelines for each type of photo.
360° Exterior Views
8 photos required
Capture your set from all angles to show overall condition and completeness.
Do This
- • Take 8 photos at 45° intervals around the set
- • Keep the camera at eye level with the set
- • Ensure the entire set is visible in each shot
- • Maintain consistent distance from the set
Avoid This
- • Cutting off parts of the set
- • Inconsistent angles between shots
- • Too close or too far from the set
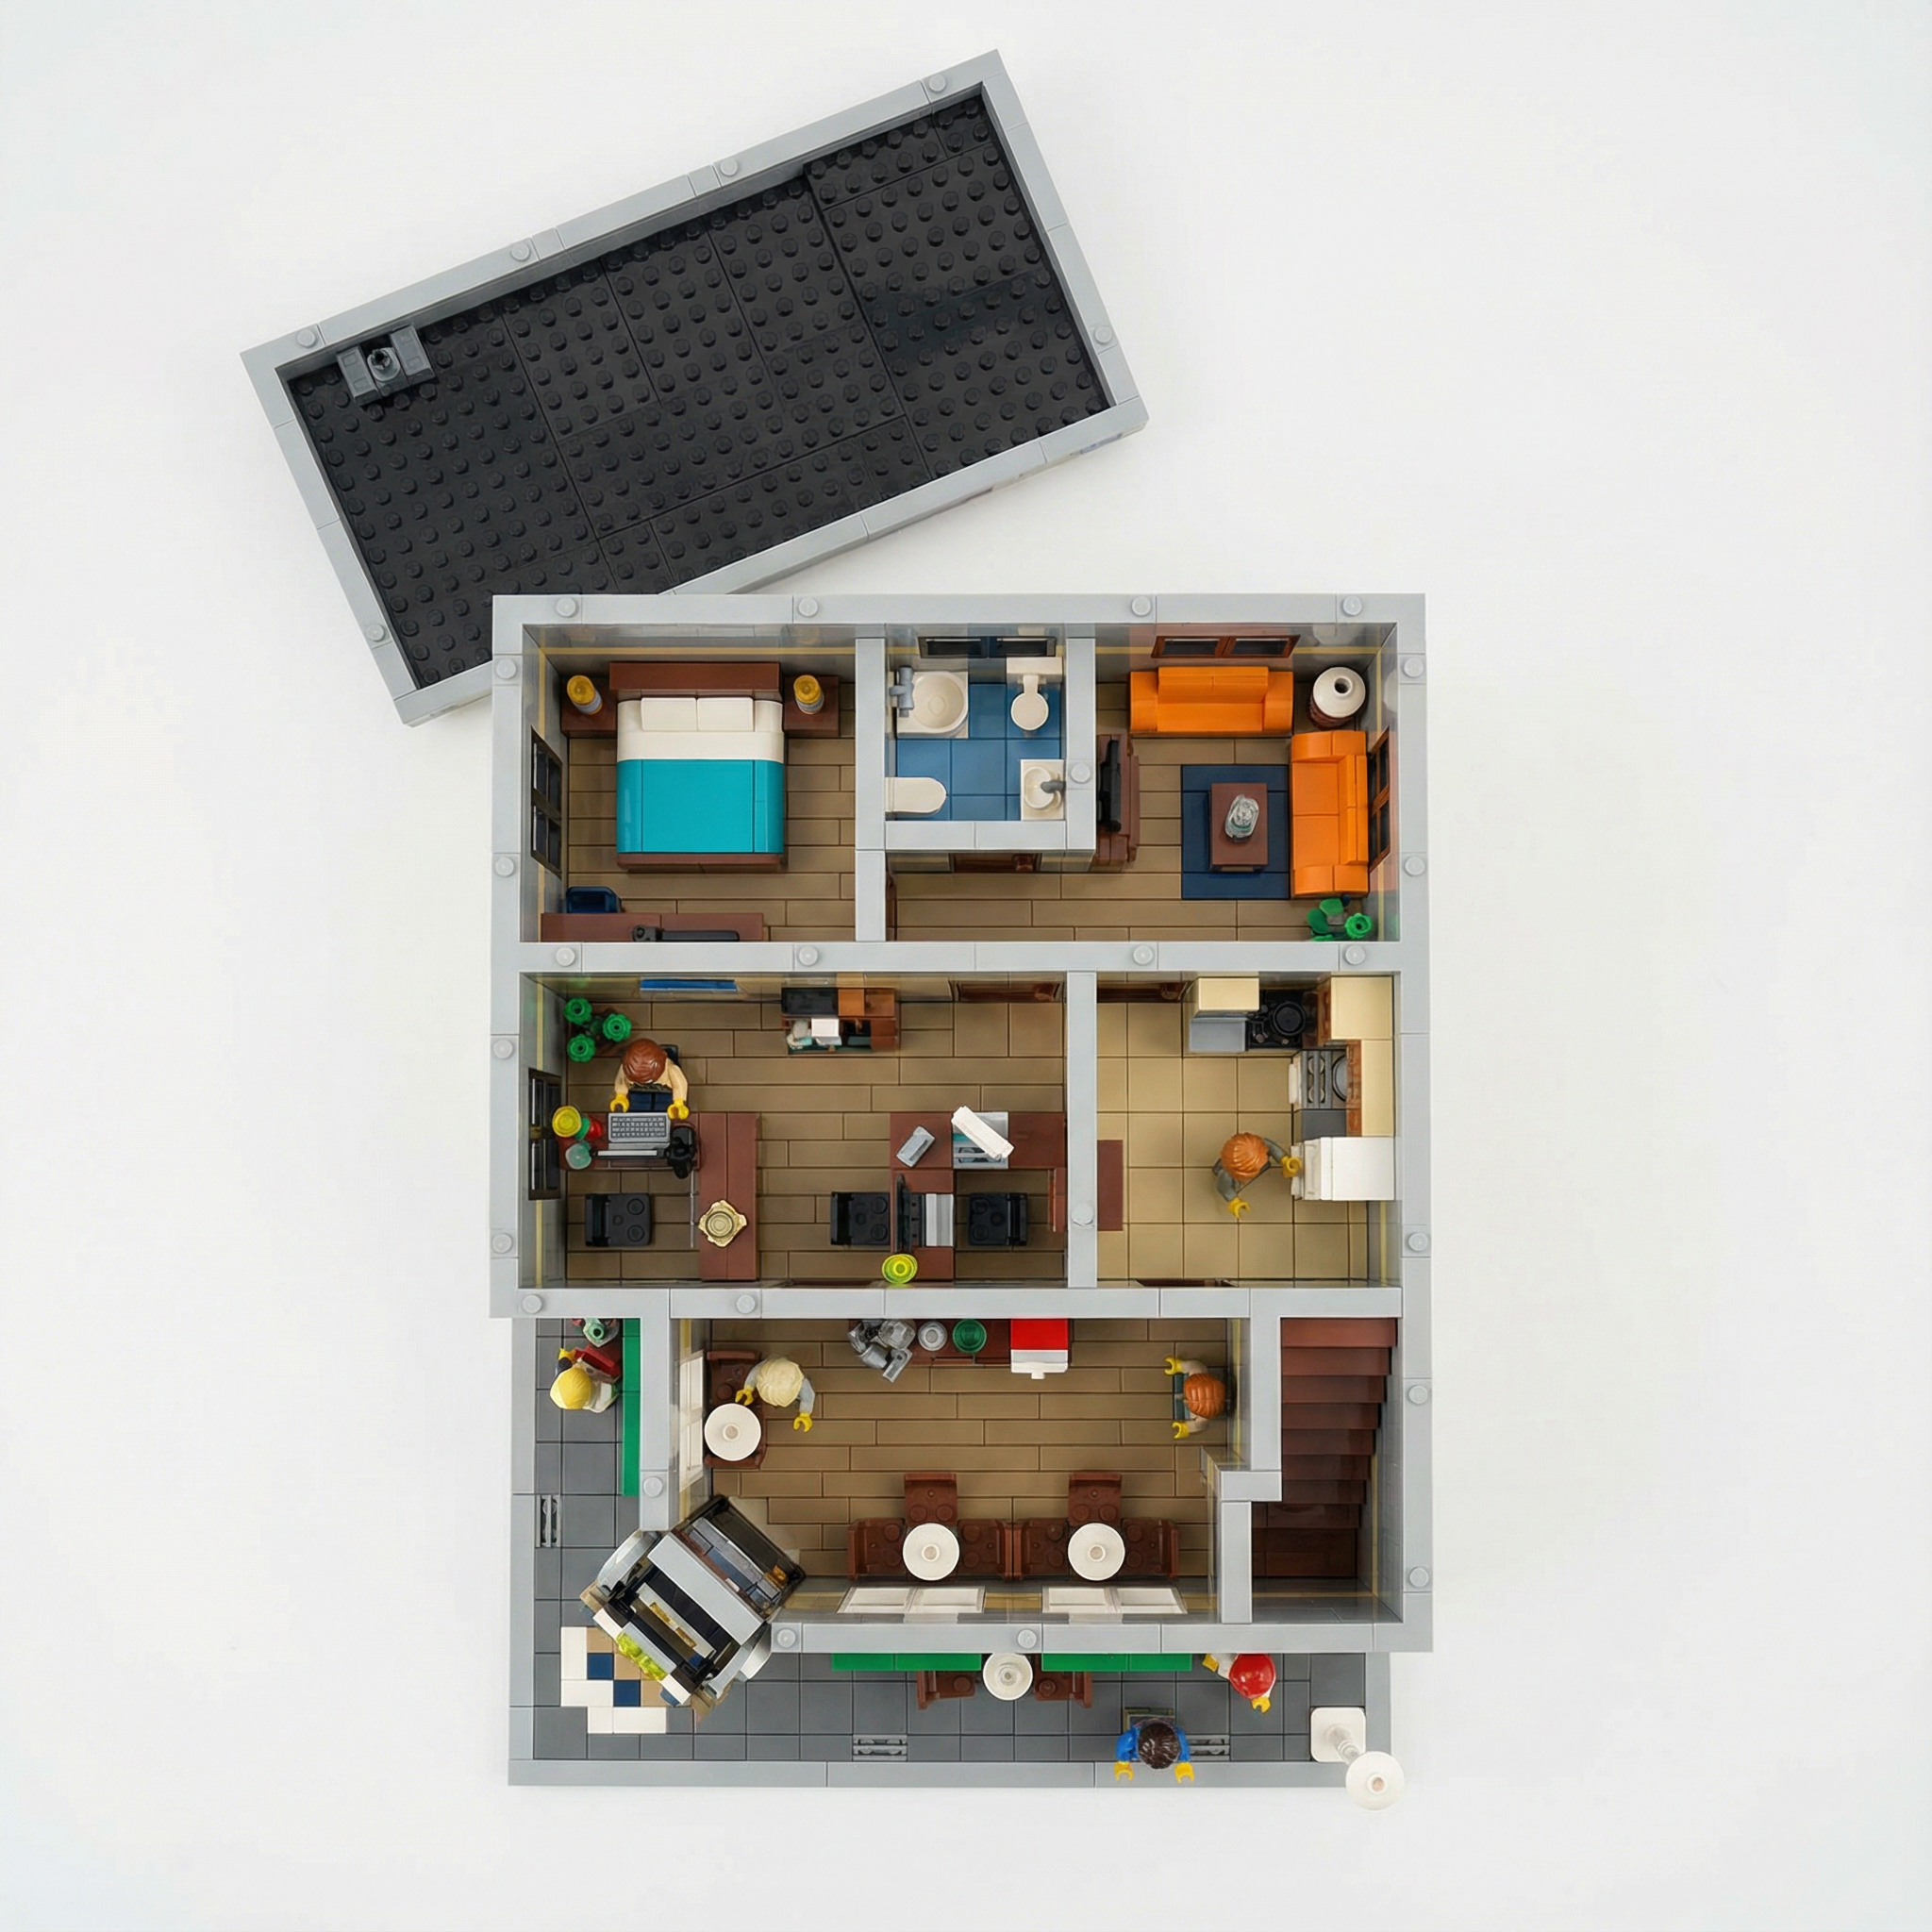
Module Top-Down Views
4 photos required
Show internal details by photographing from directly above with roofs/covers removed.
Do This
- • Remove roofs or covers to expose interior
- • Position camera directly overhead
- • Use even lighting to avoid shadows inside
- • Capture each floor or section separately
Avoid This
- • Shooting at an angle instead of straight down
- • Leaving covers on that hide details
- • Uneven lighting creating dark spots
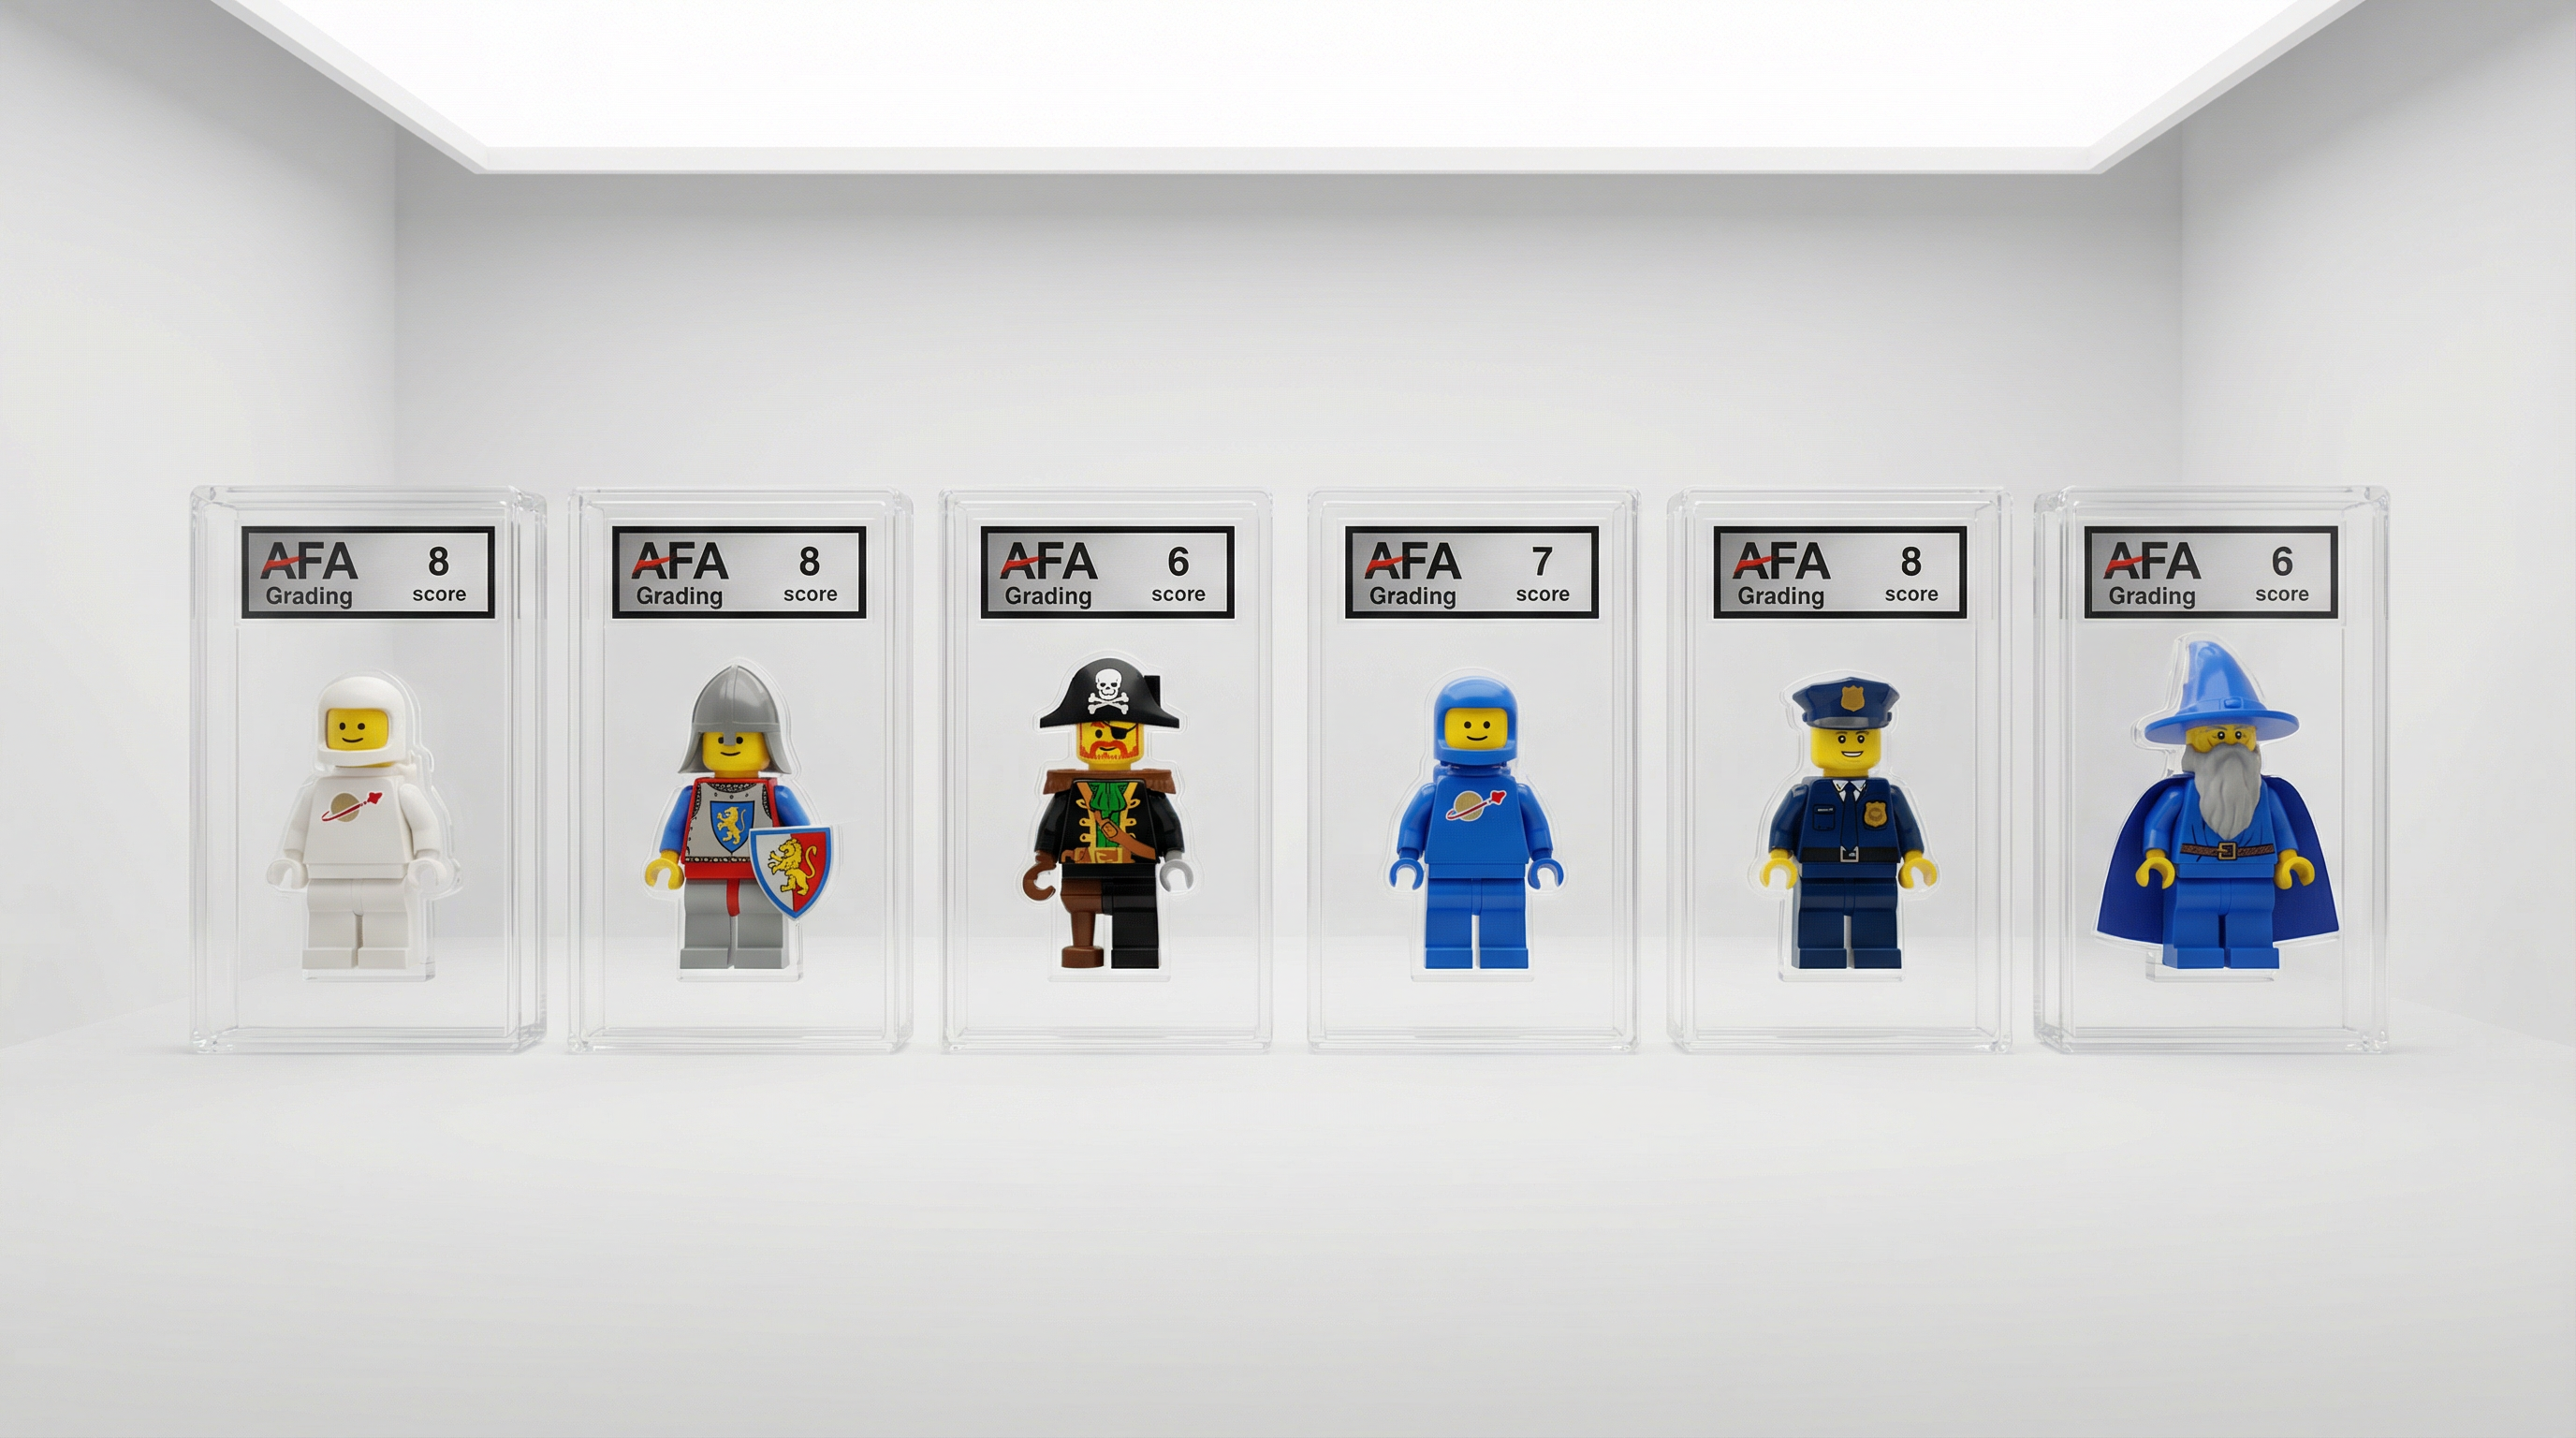
Minifigure Lineup
1 photos required(if applicable)
Display all minifigures in a row to verify completeness and condition. Only required if your set includes minifigures.
Do This
- • Arrange all minifigs in a single horizontal line
- • Show front-facing view of each figure
- • Include all accessories next to their figure
- • Ensure even spacing between figures
Avoid This
- • Overlapping or crowded figures
- • Missing accessories or weapons
- • Figures facing different directions
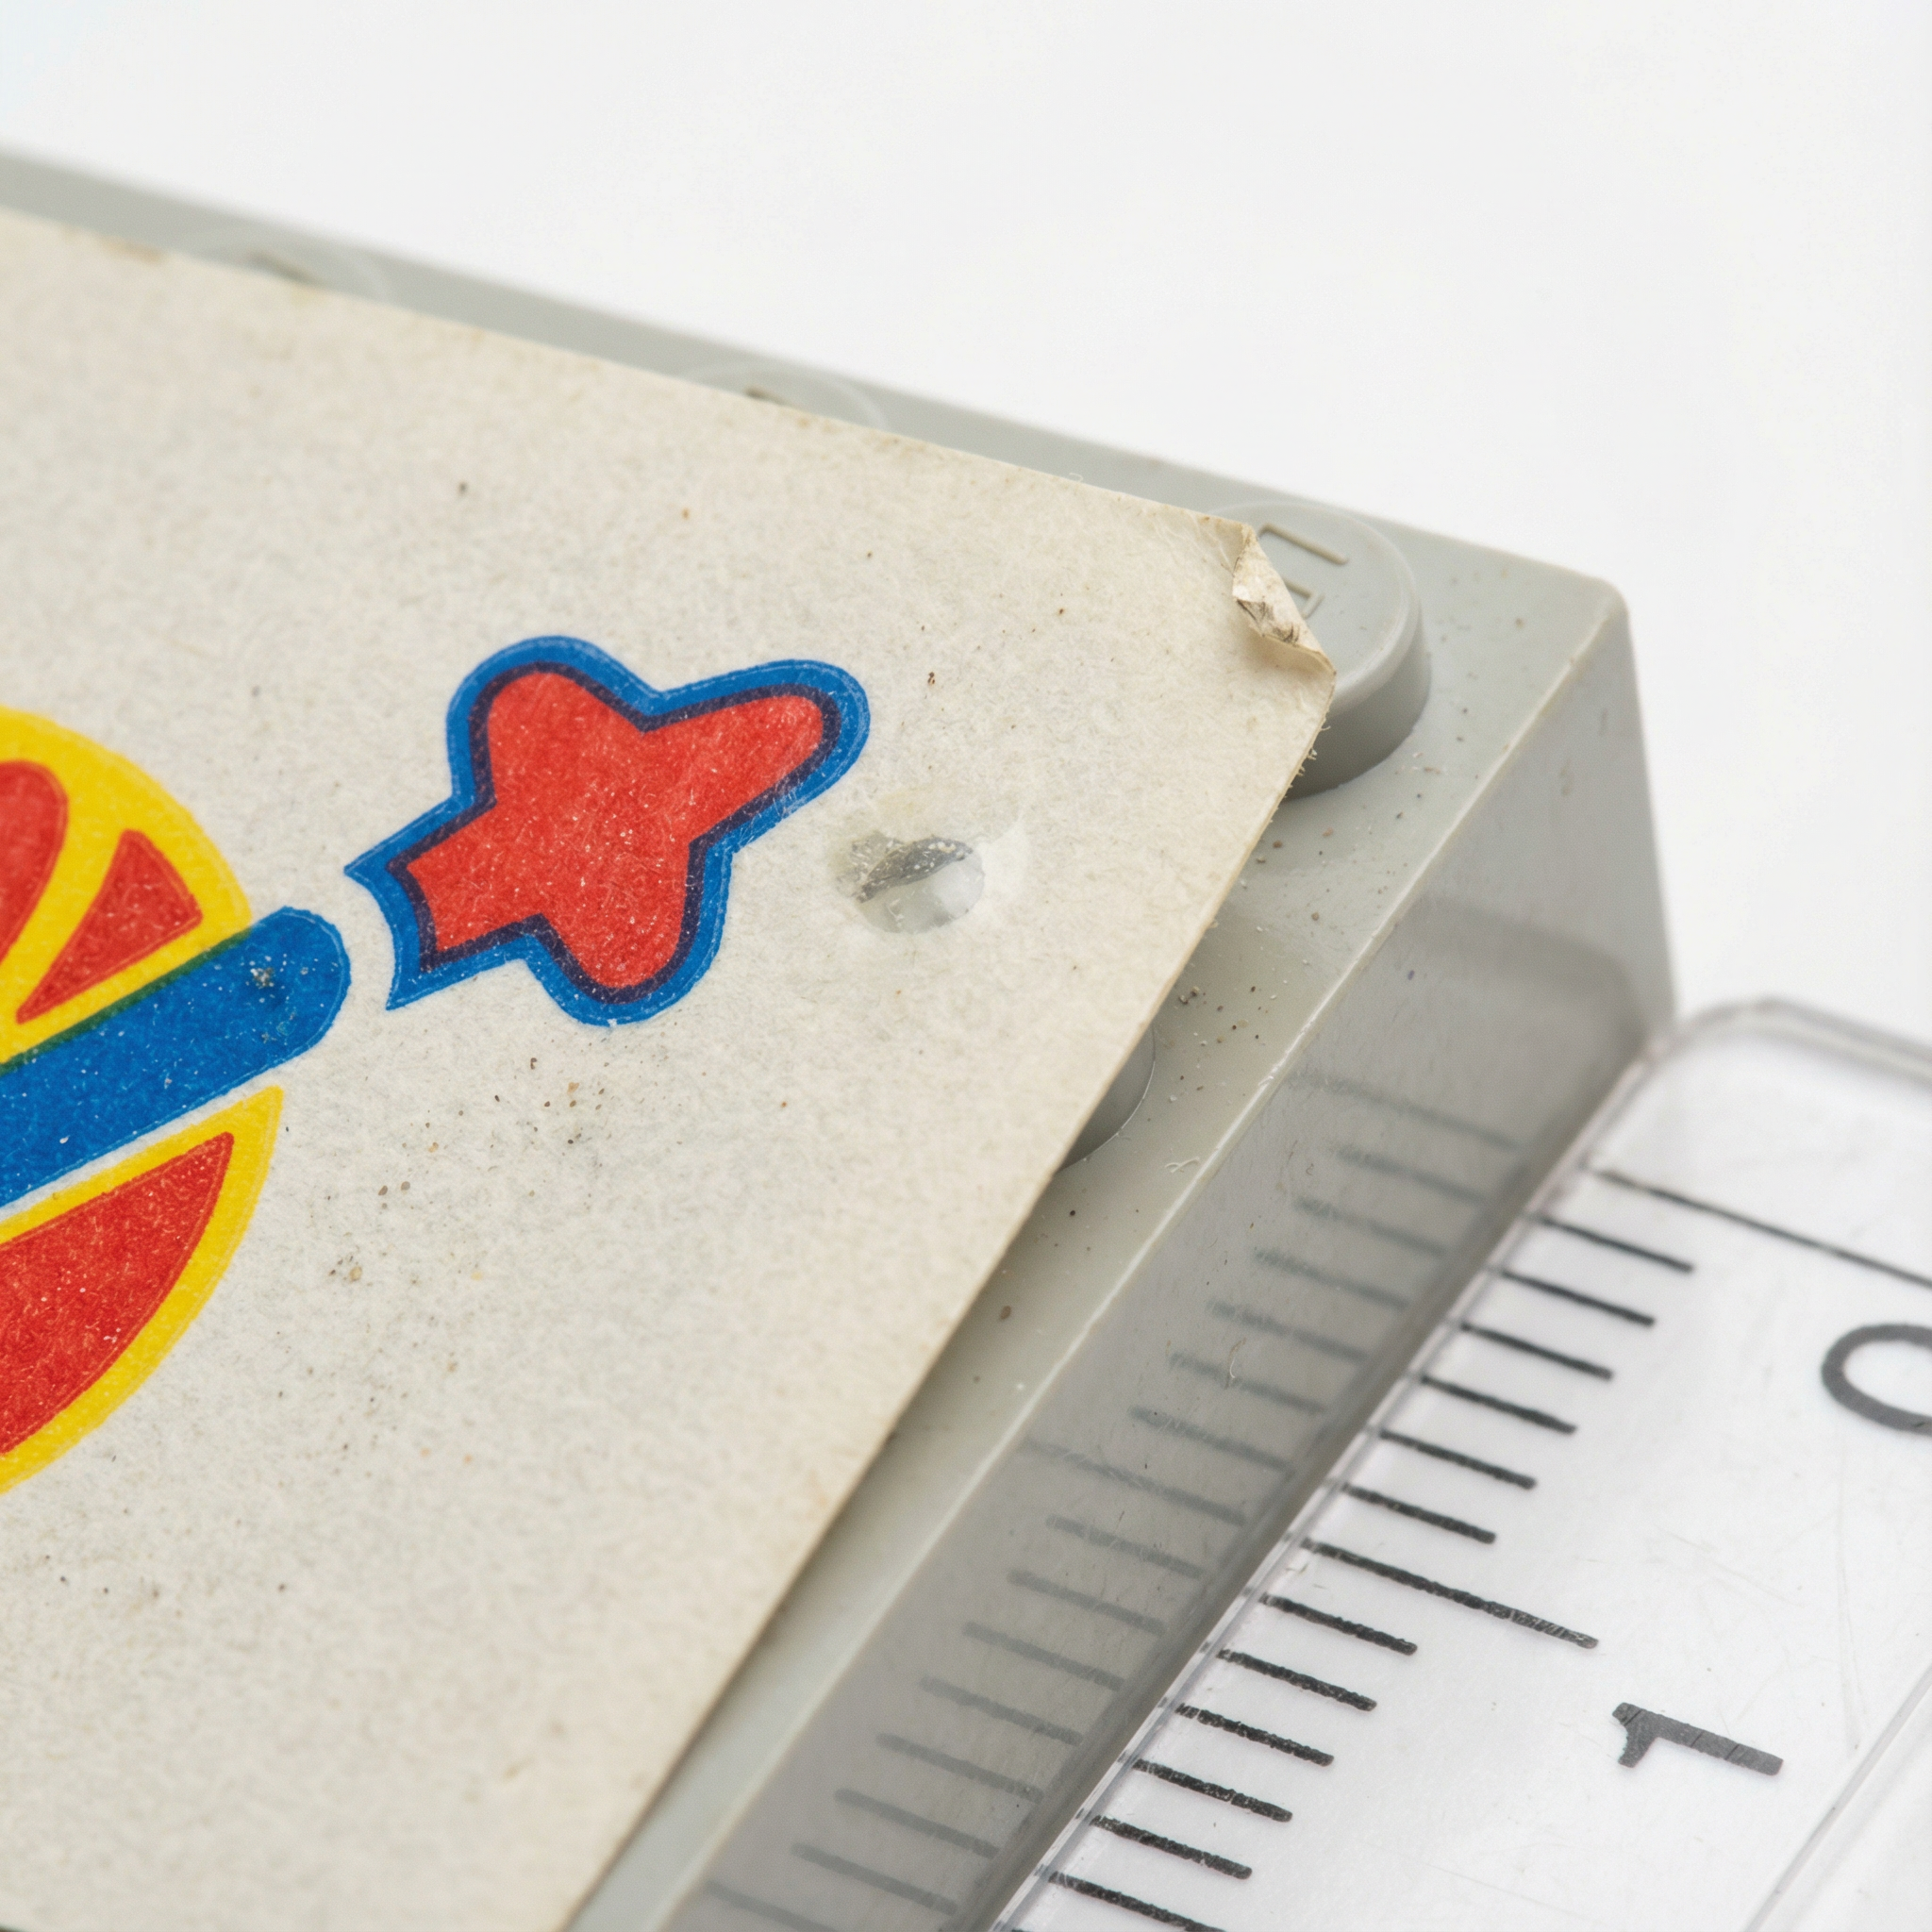
Sticker Close-Ups
2 photos required
Document sticker condition with detailed macro shots.
Do This
- • Get close enough to see sticker edges clearly
- • Show any bubbles, peeling, or misalignment
- • Capture each sticker individually if possible
- • Use good lighting to reveal surface condition
Avoid This
- • Photos too far away to see detail
- • Glare obscuring sticker condition
- • Missing stickers not documented
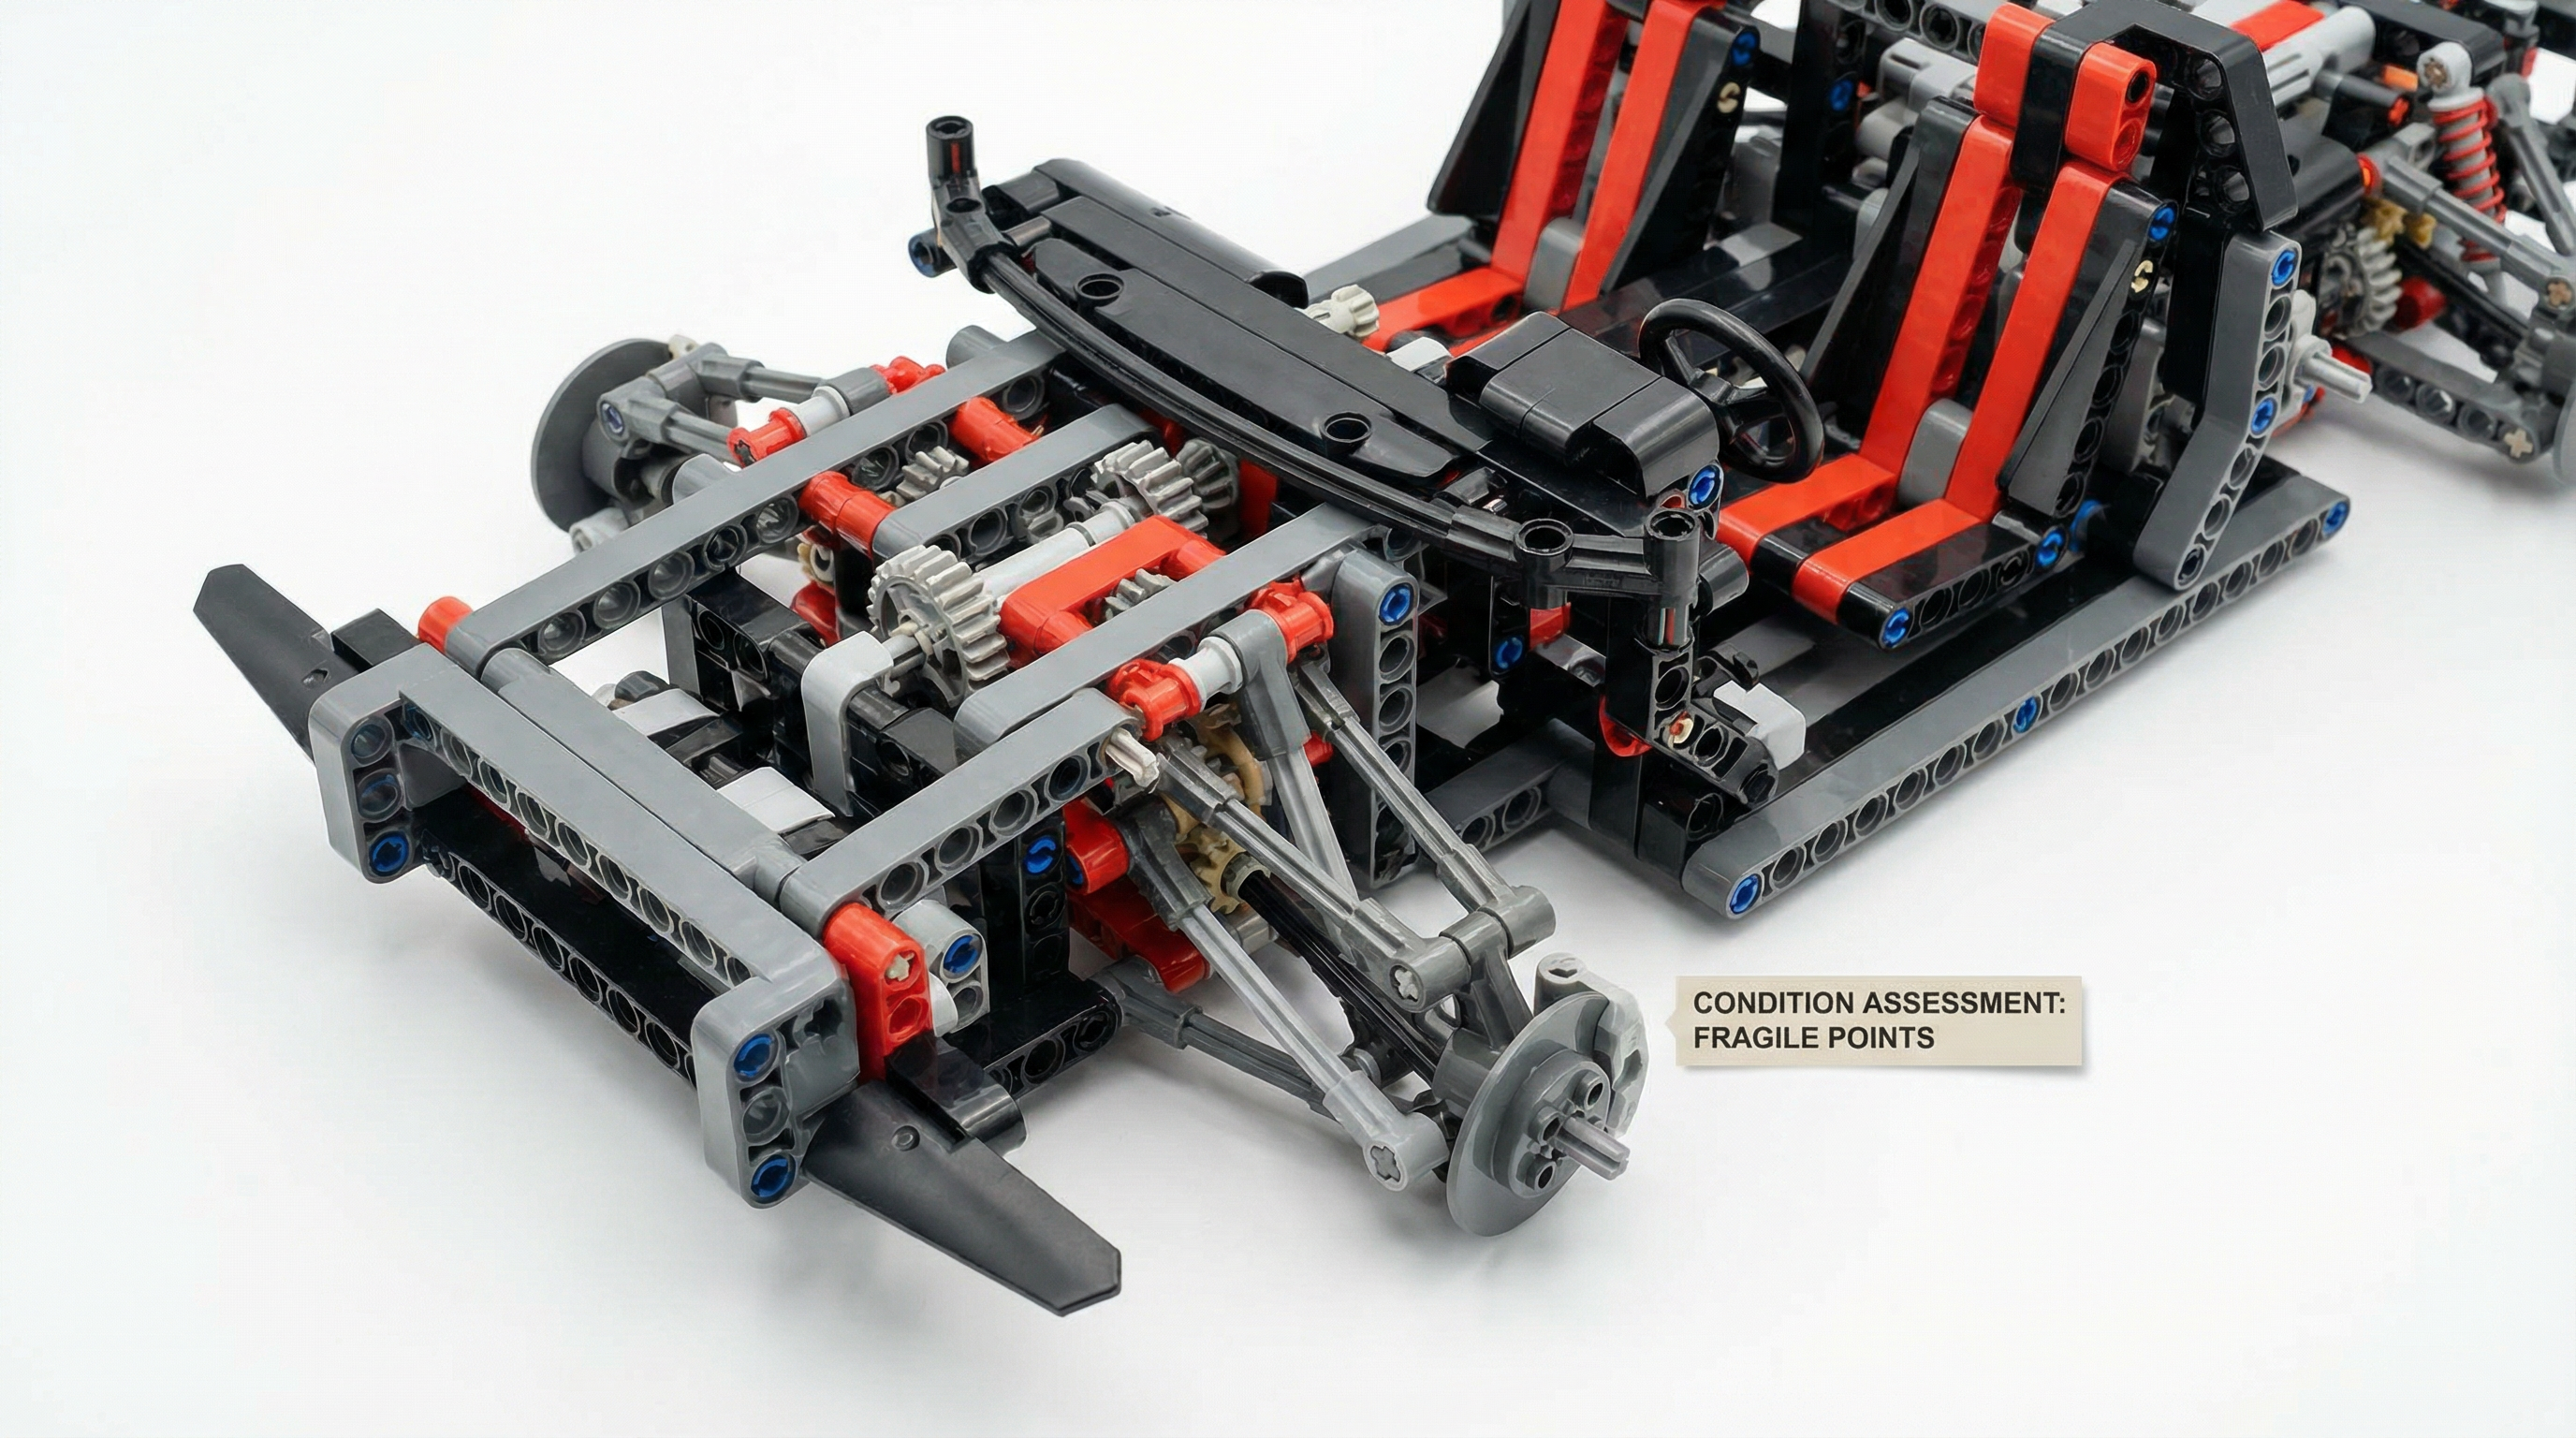
Risk Angle Documentation
2 photos required
Photograph areas prone to damage, stress, or wear.
Do This
- • Focus on connection points and joints
- • Show thin or fragile structural elements
- • Document any visible stress marks
- • Capture areas that may have been repaired
Avoid This
- • Ignoring known weak points
- • Not showing structural details clearly
- • Missing signs of previous repairs
Optional Disassembly
Optional but recommended
For higher confidence scores, show internal build quality.
Do This
- • Only disassemble if comfortable doing so
- • Document the disassembly process
- • Show internal brick connections
- • Helps verify no substituted pieces inside
Avoid This
- • Disassembling without documenting
- • Not being able to reassemble correctly
- • Damaging pieces during disassembly
Expert Photography Tips
These advanced tips can help you achieve even higher confidence scores.
Zoom in on each photo after taking it to verify sharpness. It's easier to retake immediately than to restart the entire process.
Camera shake is the #1 cause of blurry photos. Rest your phone on a stack of books or use a small tripod for consistent results.
Natural daylight provides the most accurate colors. Overcast days are actually ideal—the clouds act as a giant softbox.
Place a coin or ruler in one photo to show scale. This helps the AI understand the size of details it's analyzing.
For 360° shots, keep your camera position fixed and rotate the set on a turntable or lazy Susan for consistent angles.
If you know about damage or substitutions, photograph them clearly. Transparency improves your credibility as a seller.